When it comes to printing, whether it be a business card or a t-shirt graphic, file formatting is crucial to the outcome of a high quality looking product.
Often times this information is overlooked or lost in translation.
In this tutorial we're going to go over the proper way to format your files using Adobe Photoshop.
Note: This is a step-by-step tutorial. If you prefer to skip the tutorial, we have our templates available HERE. Each template is formatted properly and ready for use in both Adobe Photoshop and Illustrator.
If you need help with an image that you are currently working on, email it over along with the details and our designers will take a look. Our email is at the top of this page.
Before we begin: let's go over some of the basic terminology used when it comes to file formatting. If you're already familiar with formatting terms you can skip to the beginning of the tutorial by clicking HERE
While there are several file types, only Vector (.ai), PDF, PNG, and in some cases: High Resolution JPG Files, are used for printing.
-Vector (.ai) and Vector PDF Files are the absolute best.
-PNG files that are formatted properly can work just as well.
-JPEGS can also work just as well as long as your files are formatted properly.
Vector Files: These files are created in Adobe Illustrator and they are saved as ".ai" or ".pdf" format. File Example: "Front_Chest_Logo.ai" or "Front_Chest_Logo.pdf"
PDF Files: These files are created in both Adobe Photoshop and Adobe Illustrator. If you are using Photoshop, it is mandatory that your original document was formatted properly, prior to saving your file as a PDF. File Example: "Front_Chest_Logo.pdf"
PNG Files: These files are created in Photoshop and do not contain a background. It is mandatory that your original document is formatted properly prior to saving your file as a .png. File Example: "Front_Chest_Logo.png"
JPG or JPEG Files: These are also created in Photoshop. In recent years these files are also being created using smart phone design apps. While these do work, it is still mandatory that your original document is formatted properly prior to saving your file as a .jpg or jpeg file. If you intend on printing the image only (no white background) you will need to make sure that your artwork has a solid edge (No blending). File Example: "Front_Chest_Logo.jpg"
Note: Images created on an app that you use on your phone or tablet that are saved as screenshots will not work as they are only 72dpi. If you are using a design app you will want to save as a PDF.
When it comes to the "file size", the image dimensions are equally important as the image resolution.
Image Dimensions: This refers to your image size. Example: If you want the image on the front of your shirt to be printed at 12" wide x 12" long, you need to set your document size to be at least 12" wide x 12" long, with a Image Resolution of 300 dpi.
Image Resolution: The term resolution is often considered equivalent to pixel count in digital imaging. Images created in Adobe Photoshop are constructed of pixels (tiny digital dots).
The image below displays the letter R, beginning with a resolution of 0 dpi (dots per inch) and ending with an on-screen resolution of 72 dpi.

72 dpi is proper formatting for images that will be used to display on a website, but for printed graphics and t-shirts: All images that are created need to be formatted at 300 dpi. 72 dpi will not print properly
A Very Common Mistake: DO NOT ATTEMPT THIS
If your image is only 72 dpi, and you open it in Photoshop and resize it to 300 - it will not improve the quality of the image. In fact: it will make it much worse because images created in Photoshop are made from pixels. Once a pixel begins to stretch, it loses even more quality and becomes blurry. All Images that will be used to print need to be high quality Vector or 300 dpi Images.
Example: Imagine you're holding an 8.5"x11" piece of paper: You can fold the 8.5"x11" piece of paper in half to make it smaller. You can fold it again to make it even smaller. But no matter what you do, you will not be able to make that same 8.5"x11" piece of paper larger than 8.5"x11". If you want it to be bigger, you would need to start with a bigger sheet of paper. (i.e. Document Size)
Setting up your Photoshop Document: Lets get into it!
Step 1: Open Photoshop:

Step 2: At the Top of The Window: Select File > New:

Step 3: You can title your document here. Then Select The File Dimensions in Inches and make the Resolution 300. Color Mode is RGB. Background is White. Press Create.
Remember: If you want your design to be 12" x 12", you want your document size to be at least 12" x 12". In this example we're using 12" x 16"

Step 4: The New Document Will Open Up:

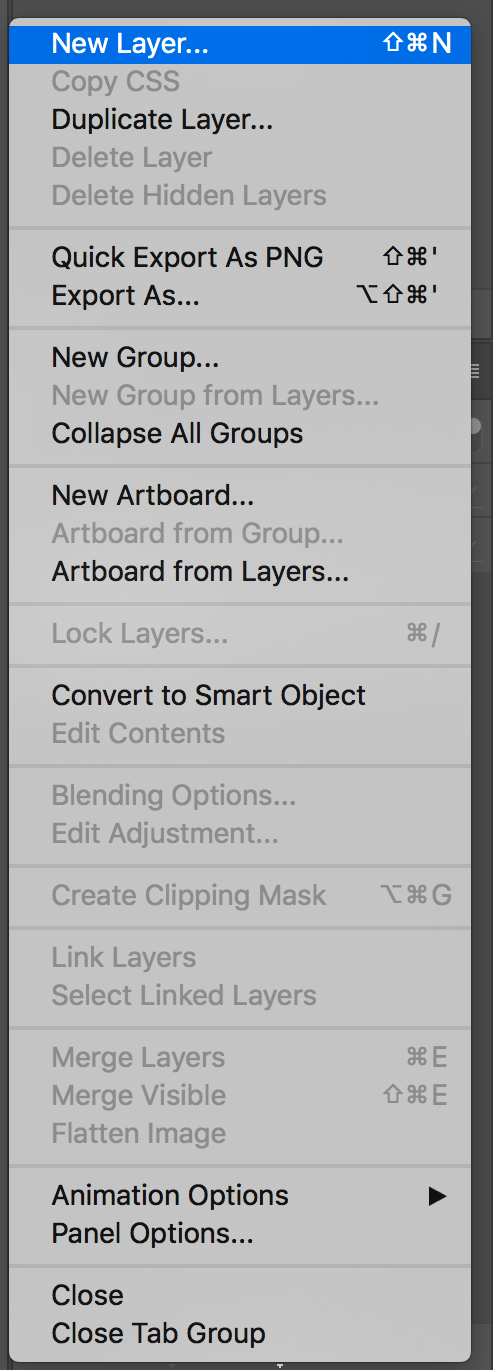
Step 5: Go To The Layers, and Select New Layer:
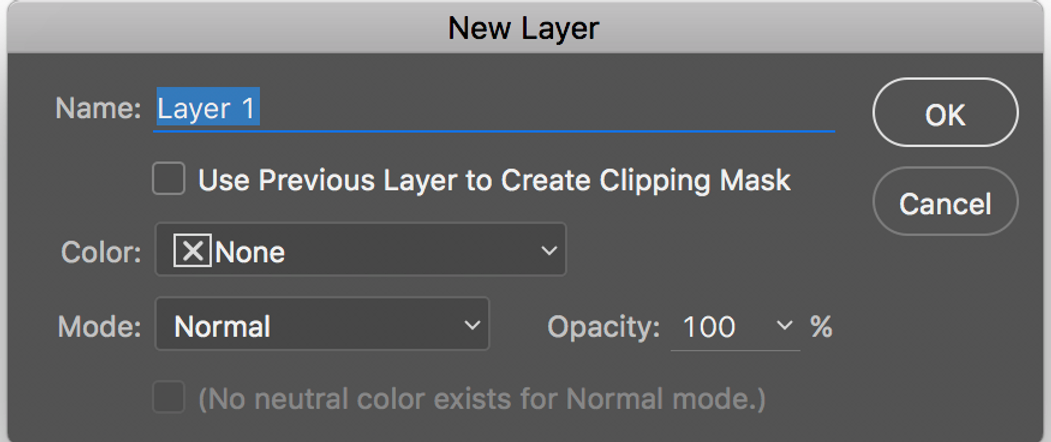
Step 6: You have the option to title the layer:
Step 7: Create your design on the New Layers: You can create as many layers as you need to construct your design.

Step 8: Once you're finished construction your design, turn the Background Layer Off by pressing the EYE icon on the left side of the panel:

Your Image Should Look Similar To The Image Below once you turn the Background Layer off:

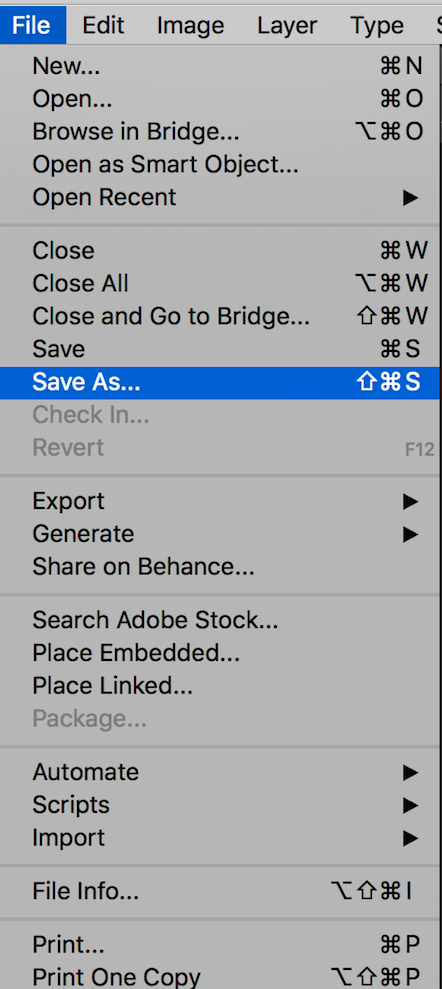
Step 9: Click File > Save As:
Step 10: Save Your Image As A PNG:

Step 11: Give Your File A Title and Press Save:

Step 12: Check the options and Press OK. FINISHED!

That's it! Now your files are ready to send off to production!
We hope this information helps and gives you a better understanding of the file formatting process. If you have any questions or need additional help with an image that you're currently working on, email it over along with the details and our designers will take a look. Our email is at the top of this page.
Don't have Photoshop or Illustrator? No Problem!

Online Ordering, Made Simple
Create Your Custom Merch Within Just a Few Clicks
Ready to Place Your Order? With our Custom Design Studio, You Can Select Your Garment of Choice, Upload Your Art Files, Select Colors and Sizes, and Checkout! If You Don't Have a Design, You Can Get Creative with our Custom Design Tools. We have a Variety of Templates, Logos and Fonts to help You Design the Perfect Merch for your Business or Brand.
